Authentication
All API requests require authentication using your API key.
In plain terms
Every request to the API must include your API key in the X-API-Key header. Without it, the API returns 401 Unauthorized. Never put the API key in client-side JavaScript—use a backend proxy that adds the key before calling Moveris.
API Key Authentication
Include your API key in the request header using the X-API-Key header.
curl -X POST "https://api.moveris.com/api/v1/fast-check" \
  -H "Content-Type: application/json" \
  -H "X-API-Key: your-api-key" \
  -d '{ ... }'
Example with JavaScript
const response = await fetch('https://api.moveris.com/api/v1/fast-check', {
  method: 'POST',
  headers: {
    'Content-Type': 'application/json',
    'X-API-Key': 'your-api-key'
  },
  body: JSON.stringify({
    session_id: crypto.randomUUID(),
    source: 'live',
    frames: frames
  })
});
Successful responses use the standard HTTP envelope: read data for verdict, scores, and metadata. Errors use success: false and an errors array.
Example with Python
import requests

response = requests.post(
    'https://api.moveris.com/api/v1/fast-check',
    headers={
        'Content-Type': 'application/json',
        'X-API-Key': 'your-api-key'
    },
    json={
        'session_id': str(uuid.uuid4()),
        'source': 'live',
        'frames': frames
    }
)
Keep your API key secure
Never expose your API key in client-side code. Always make API calls from your server.
API Key Scopes
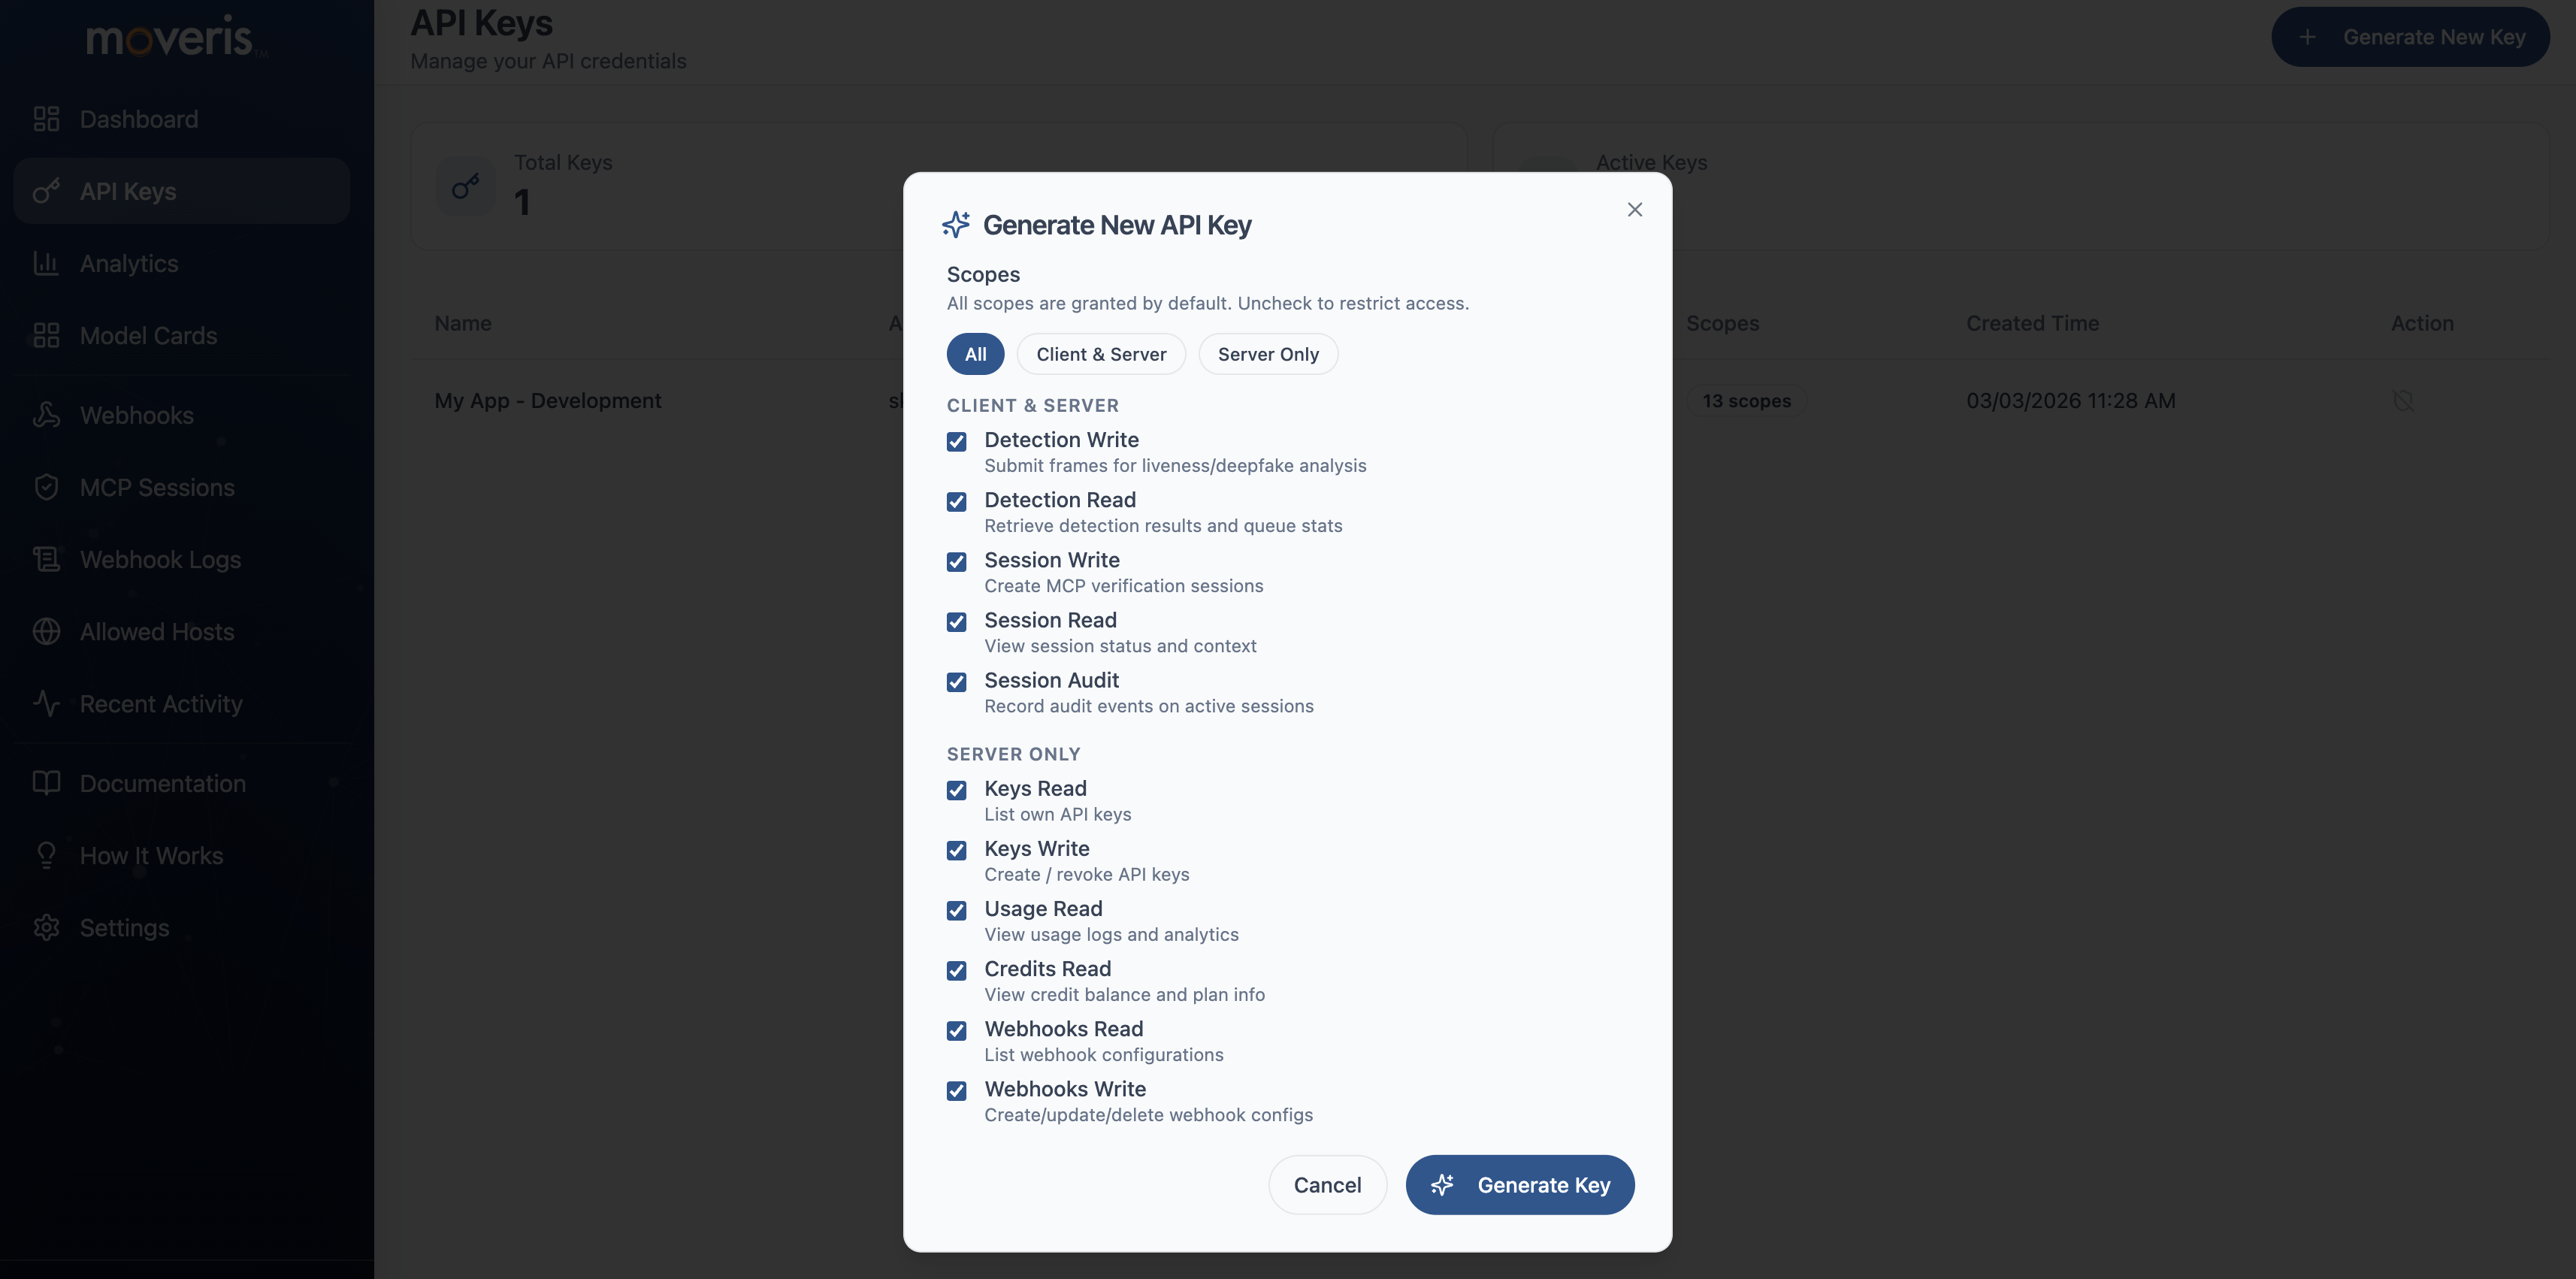
API keys can be restricted by scope for least-privilege access. When creating a key in the Developer Portal, you can assign scopes such as:
| Scope | Description |
|---|---|
detection:write | Submit liveness checks (Fast Check, Fast Check Stream, Fast Check Crops, Verify) |
detection:read | Retrieve detection results and queue stats |
session:write | Create and manage MCP verification sessions |
session:read | View session status and metadata |
session:audit | Record audit events on active sessions |
keys:read | List and read API keys |
keys:write | Create, update, revoke API keys |
usage:read | View usage logs and analytics |
credits:read | View credit balance and plan info |
webhooks:read | List webhook configurations |
webhooks:write | Create, update, delete webhook configs |
hosts:read | List allowed CORS origins |
hosts:write | Manage allowed CORS origins |
Keys with no scopes (empty list) have full access—this preserves backward compatibility with existing keys. Keys with scopes are restricted: a request using a key that lacks the required scope returns 403 with error: "insufficient_scope" and required_scope in the response. See Errors for handling.
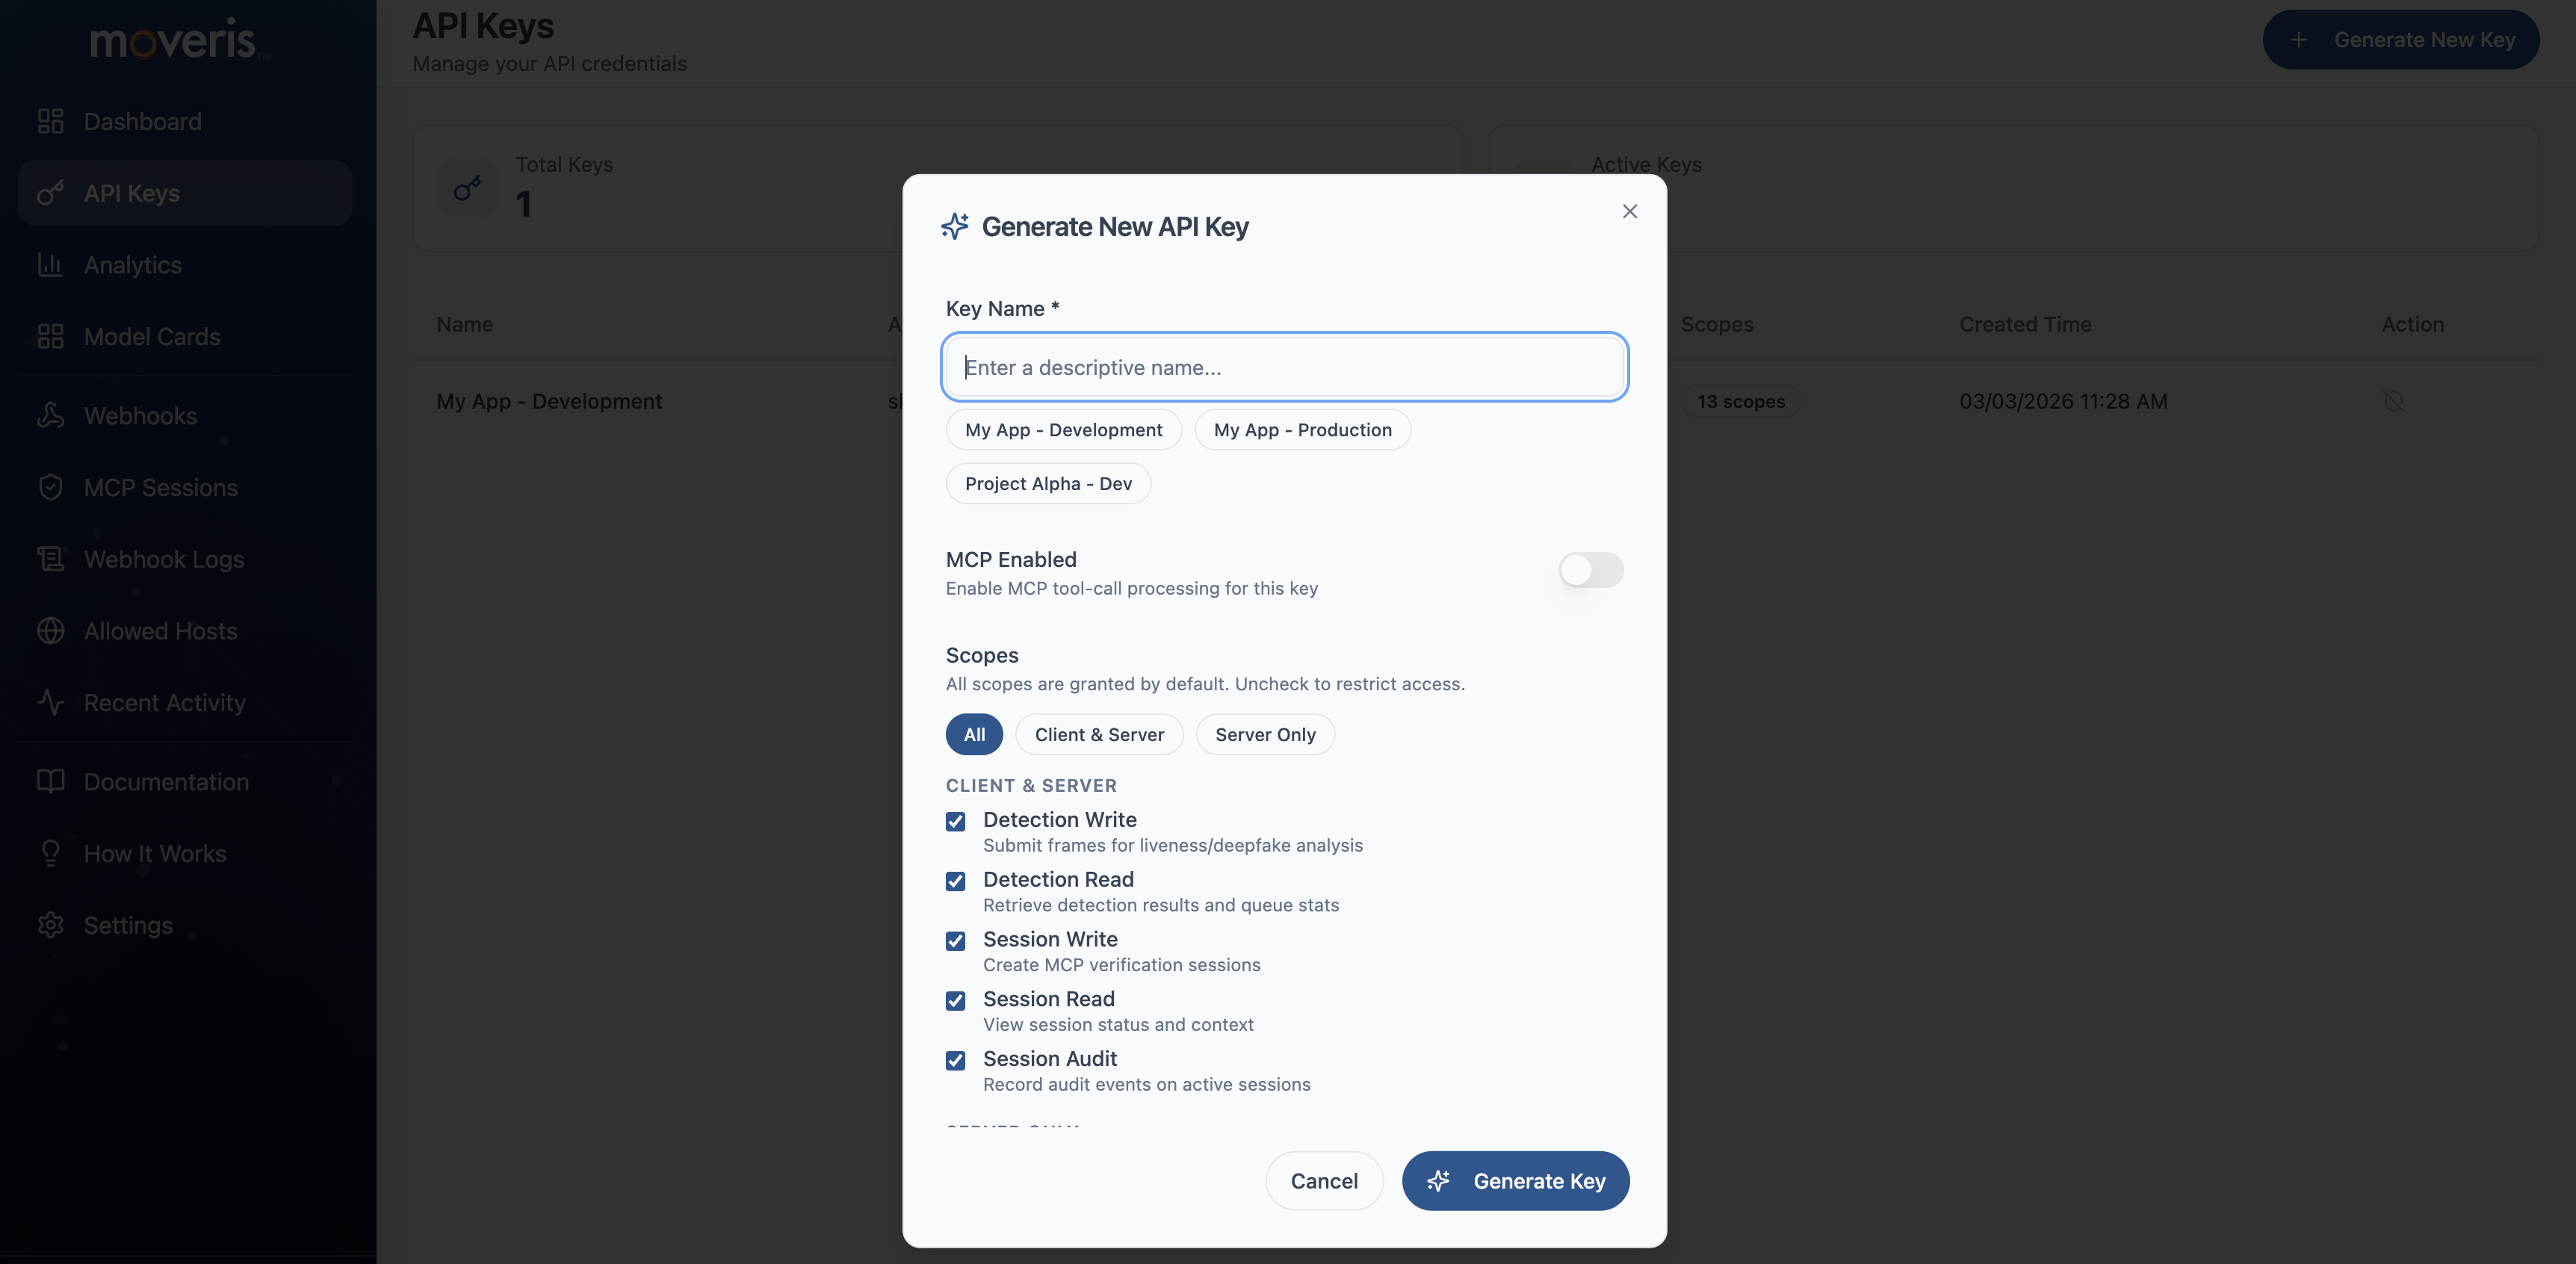
Creating API Keys with Scopes
Create scoped API keys in the Developer Portal when creating a new key:
- Navigate to API Keys — From the dashboard, go to API Keys and click Create API Key.
- Name your key — Enter a descriptive name (e.g., "Production detection key").
- Select scopes — Choose the scopes this key will have. Leave empty for full access, or select only the scopes you need for least-privilege access.
- Create and copy — After creation, copy the key—you will not be able to see it again.
Screenshot: Create API Key form
Screenshot: Scopes selector
Security Best Practices
- Store keys in environment variables - Never hardcode API keys in your source code
- Use a backend proxy - Client-side apps should call your backend, which adds the API key
- Rotate keys regularly - Generate new keys periodically and revoke old ones
- Monitor usage - Watch for unexpected spikes that might indicate compromised keys